In 2010, WordPress released version 3.0 of it popular content management platform. Among the many improvements included in the release, the WordPress community combined WordPress MU into the main WordPress configuration. Since the change, WordPress has made it easier to create multiple WordPress sites on one server. Whereas earlier, each WordPress blog on a server needed to have its own installation, now a new WordPress site can be installed once, and other blogs can be set up from within the WordPress dashboard.
Setup
The steps in this tutorial require the user to have root privileges. You can see how to set that up in the Initial Server Setup
Before working with WordPress, you need to have LAMP installed on your virtual private server. If you don’t have the Linux, Apache, MySQL, PHP stack on your VPS, you can find the tutorial for setting it up in the Ubuntu LAMP tutorial.
Once you have the user and required software, go ahead and Install WordPress. However—make sure you stop at the end of step 4 (We will add one more thing to the WordPress config file in the next step)
Step One—Setup Your WordPress Installation
With WordPress installed, we need to take a series of steps in a variety of configuration files.
To begin with, modify the WordPress configuration, activating the multisite networking:
sudo nano /var/www/wp-config.php
Add the following line above “/* That’s all, stop editing! Happy blogging. */”
/* Multisite */
define('WP_ALLOW_MULTISITE', true);
Activate the apache Mod_Rewrite module:
sudo a2enmod rewrite
Follow up by permitting .htaccess changes in the virtual file. Open up your virtual host file (I am simply going to make these changes in the default Apache one).
sudo nano /etc/apache2/sites-enabled/000-default
In the following section, change AllowOverride to All:
<Directory /var/www/>
                Options Indexes FollowSymLinks MultiViews
                AllowOverride All
                Order allow,deny
                allow from all
</Directory>
Restart apache:
sudo service apache2 restart
Once that is all done, the wordpress online installation page is up and waiting for you:
Access the page by adding /wp-admin/install.php to your site’s domain or IP address (eg. example.com/wp-admin/install.php) and fill out the short online form.
Step Two—Setup Multiple WordPress Sites
Go into your WordPress dashboard and select the section called tools:
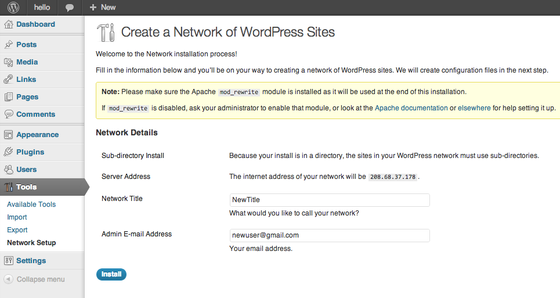 Once you have filled out the required fields, go through the directions on the next page (I have elaborated on them further under the image):
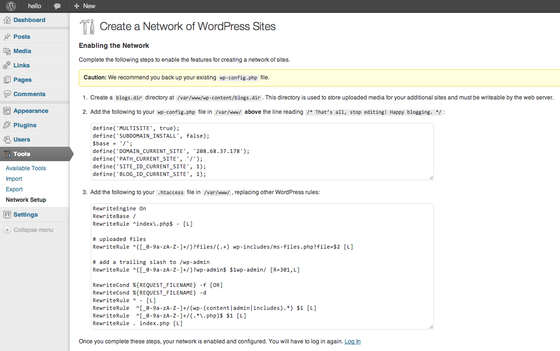
- Create a directory for your new sites:
sudo mkdir /var/www/wp-content/blogs.dir
- Alter your WordPress configuration. Make sure to paste this above the line /* That’s all, stop editing! Happy blogging. */:
sudo nano /var/www/wp-config.php
define('MULTISITE', true); define('SUBDOMAIN_INSTALL', false); $base = '/'; define('DOMAIN_CURRENT_SITE', 'YOUR IP ADDRESS HERE'); define('PATH_CURRENT_SITE', '/'); define('SITE_ID_CURRENT_SITE', 1); define('BLOG_ID_CURRENT_SITE', 1); - Finally, add WordPress’s rewrite rules to /var/www htaccess file:
sudo nano /var/www/.htaccess
RewriteEngine On
RewriteBase /
RewriteRule ^index\.php$ - [L]

# uploaded files
RewriteRule ^([_0-9a-zA-Z-]+/)?files/(.+) wp-includes/ms-files.php?file=$2 [L]

# add a trailing slash to /wp-admin
RewriteRule ^([_0-9a-zA-Z-]+/)?wp-admin$ $1wp-admin/ [R=301,L]

RewriteCond %{REQUEST_FILENAME} -f [OR]
RewriteCond %{REQUEST_FILENAME} -d
RewriteRule ^ - [L]
RewriteRule  ^[_0-9a-zA-Z-]+/(wp-(content|admin|includes).*) $1 [L]
RewriteRule  ^[_0-9a-zA-Z-]+/(.*\.php)$ $1 [L]
RewriteRule . index.php [L]
After making all of the necessary changes, log into WordPress once more.
Step Three—Setup Your New WordPress Site
After you log into your site once again, you will notice that the header bar now has a section called, “My Sites” instead of simply displaying your blog’s name:
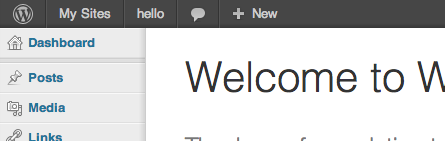 You can create new sites by going to My Sites at the top, clicking on Network Admin, and clicking on Sites:
